How I Turned a Cheap USB Radio Dongle Into My Own Live Aircraft-Tracking Station
I recently went down another one of those rabbit holes where I started with a simple question: “What can I actually do with these RTL-SDR radio dongles I have lying around?”
A few hours of experimenting later, I had built my own ADS-B aircraft receiver on one of my older Windows computers. I can now sit at my desk and watch aircraft being received directly by an antenna at my house, plot them on a live 2D map, or watch them moving around in a 3D visualization.
And this is important: I am not simply looking at aircraft data somebody else collected on the Internet.
My computer is actually receiving the radio transmissions from the airplanes.
First, the non-geek explanation
Most commercial aircraft continuously broadcast information about themselves using a system called ADS-B — Automatic Dependent Surveillance–Broadcast.
Among other things, those broadcasts can contain an aircraft’s position, altitude, speed, heading, identification and other information.
A lot of this traffic is transmitted on 1090 MHz.
With an inexpensive RTL-SDR USB radio receiver and an appropriate antenna, an ordinary computer can listen to those transmissions.
So the basic setup at my house looks like this:
AIRPLANE
↓
1090 MHz RADIO SIGNAL
↓
ANTENNA
↓
RTL-SDR USB RECEIVER
↓
MY COMPUTER
↓
DECODER
↓
LIVE AIRCRAFT DATA
↓
2D / 3D MAP
There’s something especially satisfying about clicking an airplane on the screen and realizing that the information I’m looking at was received by a little antenna sitting outside my own house.
The hardware
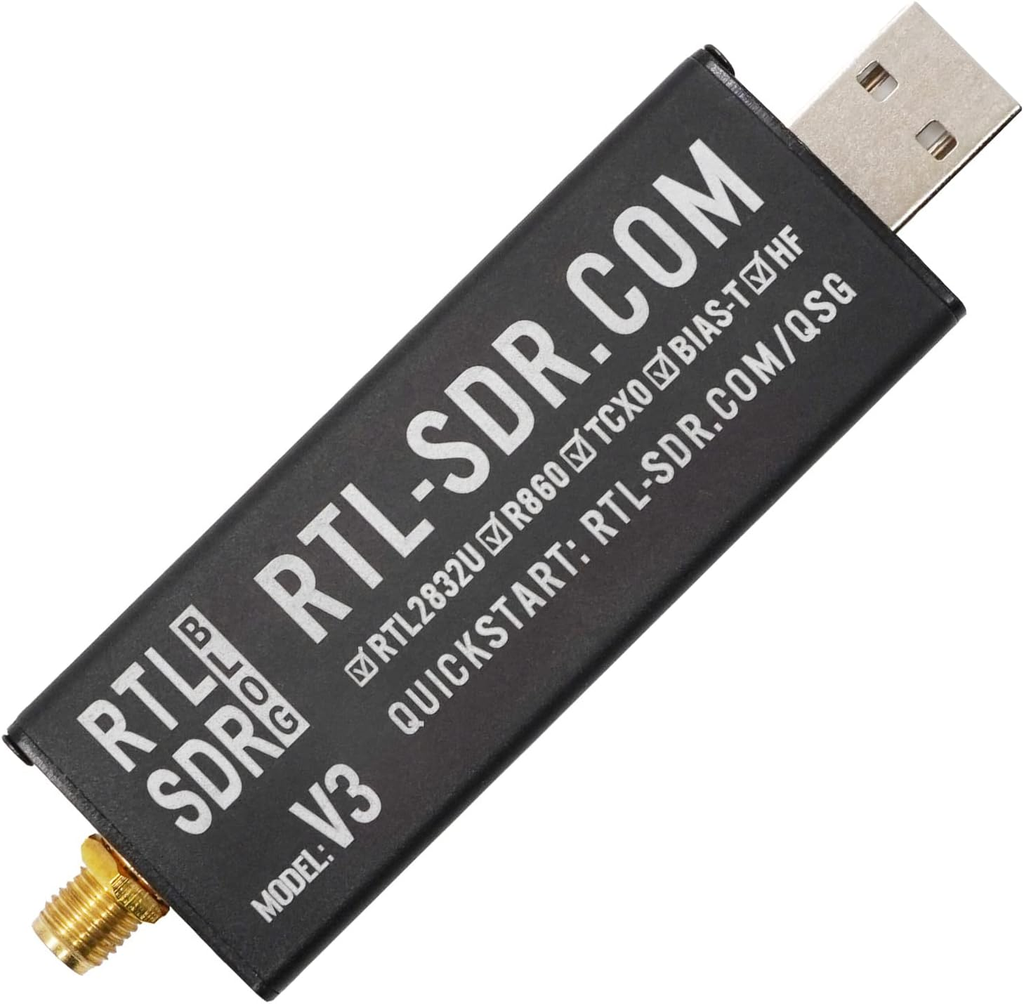
The radio I’m using is an RTL-SDR. These little USB devices originated from inexpensive digital television tuner hardware, but radio hobbyists discovered years ago that they could be used as remarkably capable software-defined radios.
Mine identifies as an RTL2838 device with the Rafael Micro R820T tuner.
For testing, I didn’t even have the proper permanent ADS-B antenna yet. I made a temporary antenna arrangement, added a longer cable, and moved the antenna outside.
It worked.
A proper 1090 MHz ADS-B antenna is the next step, and that will ultimately live outside with a permanent cable run back to the receiver.
The antenna matters enormously. At frequencies around 1 GHz, getting the antenna outside, getting it higher, having a clear view of the sky and minimizing unnecessary feed-line loss can make a substantial difference.
Now for the geeks
The computer doing this is one of my DockerLab machines. It’s a Windows system running WSL2, Ubuntu and Docker Desktop.
The RTL-SDR physically connects to Windows, but the ADS-B software is running inside Linux containers.
That created an interesting chain:
Windows USB
→ usbipd
→ WSL2 / Ubuntu
→ Docker
→ ADS-B Ultrafeeder
→ readsb
→ tar1090
→ browser
Windows sees my receiver as:
VID:PID 0bda:2838
RTL2838UHIDIR
I deliberately left its working Windows WinUSB driver alone. There was no reason to start randomly changing drivers with Zadig once the hardware was working.
The USB device gets passed from Windows into WSL2 using USB/IP. Once Ubuntu can see the RTL2838 device with lsusb, Docker can expose /dev/bus/usb to the ADS-B container.
For the main receiver stack I settled on ADS-B Ultrafeeder from the SDR-Enthusiasts project. It gives me the decoder and tar1090 web interface in a nice containerized package.
My permanent 2D display is available locally on port 8078.
I’ve named the receiver:
Swash Manor Airspace
I supplied the receiver with my actual latitude, longitude and approximate antenna altitude so it knows where the receiving station is located.
Once everything was working, I was seeing dozens of aircraft simultaneously, including aircraft identification, registration where available, altitude, speed, track, distance, signal strength and other data.
Then I added 3D
Because apparently a perfectly good live aircraft map wasn’t enough.
I added a second Docker application called ADS-B 3D.
Instead of replacing my working receiver, I connected the 3D application to the existing Ultrafeeder Docker network. Both applications therefore use the same live receiver data.
The result is two completely different ways of looking at my airspace:
2D tar1090 — fast, information-dense and excellent for actually studying aircraft.
3D ADS-B — aircraft moving through a three-dimensional representation of the airspace with flight paths, altitude lines and other visual information.
The 3D application lives on a different local port, 8086, so I can keep both.
I did run into one unresolved annoyance: one of the available dark CARTO basemaps now wants an API key. I even obtained a CARTO key and tried the usual URL/API tricks without success. Rather than invent configuration variables that the application doesn’t document, I’ve temporarily moved to one of the free basemaps and asked about proper API-key support.
That is also part of projects like this: knowing when to stop guessing.
What happens when I unplug the radio?
I learned this one today.
I unplugged the RTL-SDR before changing the antenna, then plugged it back in afterward.
Windows could see it again, but my aircraft display initially couldn’t.
Why?
The physical USB device had to be attached back to WSL.
usbipd list showed the RTL-SDR and its current BUSID. I attached that device to WSL, confirmed from Ubuntu with lsusb that Linux could see the Realtek RTL2838, and restarted the Ultrafeeder Docker container.
For a little while the map sat there saying it was connecting.
Then the aircraft started pouring back in.
That’s troubleshooting in a nutshell: verify each link in the chain instead of randomly changing things.
And yes, I built this with ChatGPT
I used ChatGPT extensively as a tool while building this.
Not simply to ask, “How does ADS-B work?”
I used it as a project assistant while I worked: figuring out USB passthrough, Docker Compose configuration, ports, receiver settings, troubleshooting, documenting what worked, keeping recovery instructions and helping me avoid stepping on the other Docker services already running on this computer.
That last part is important because this computer isn’t a clean laboratory machine. It already runs other Docker projects. I couldn’t simply start changing networks, ports and configurations without considering what I might break.
AI can be extremely useful for this kind of work, but here’s something I’ve learned:
MAKE BACKUPS AND KEEP NOTES.
And remind the AI to do it.
During a long technical conversation, you’ll discover things, change configurations, solve problems and occasionally find that something suggested earlier was wrong. Once you finally have a known-good configuration, document it.
I keep project-memory and recovery notes containing things such as known-good Docker Compose configurations, ports, hardware IDs, important commands, directories, troubleshooting procedures and what NOT to change.
I also keep copies outside the machine I’m experimenting on.
That way, six months from now, I don’t have to remember how the hell I made all of this work.
AI project memory has gotten much more useful
The newer file and connected-storage capabilities in ChatGPT can make this kind of ongoing project considerably easier. I can keep project documentation in files and cloud storage that ChatGPT can work with, rather than relying entirely on one enormous conversation.
There is an important distinction, though: don’t assume that a browser session automatically has unrestricted access to every folder on your computer. It doesn’t. Local computer access depends on the ChatGPT environment and permissions you’re actually using.
For my projects, I maintain lightweight recovery documentation locally and copies in cloud storage. That gives the AI something concrete to work from when we return to a project later.
And by “backup” here I don’t mean dumping gigabytes of Docker images and virtual disks into an AI folder.
I mean the stuff that actually lets me rebuild the project:
Known-good configuration.
Commands.
Ports.
Paths.
Hardware information.
Recovery procedure.
Changes I’ve made.
Problems we’ve already solved.
A few kilobytes of good documentation can sometimes be more valuable than gigabytes of poorly organized backups.
What’s next?
The temporary antenna proved the concept.
Next comes a proper outdoor 1090 MHz ADS-B antenna and a permanent cable run. Once that’s installed, I’ll be interested to see just how far Swash Manor Airspace can hear.
And, knowing me, ADS-B probably isn’t where this SDR rabbit hole ends.
There are weather satellites, radio systems, digital signals and an enormous amount of RF activity happening around us all the time.
Most of it is completely invisible.
Until you plug in a $30-ish radio and start listening.